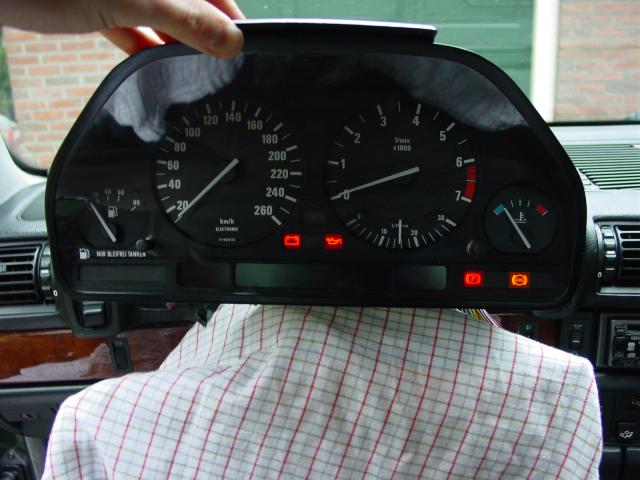
I never really cared about this as it was only irritating when cold. I did at somepoint buy some new capacitators just in case. Well that was smart thinking! After a long trip where the cluster would flicker randomly lighting up the miles and km lights at the same time and randomly setting pixels on the matrix display it finally died at home. The next morning the cluster looked like this with the ignition switched on:
Yes, the temp was already in the blue, I lost half a tank of fuel, the fuel consumption is quite high considering the engine isn't running and the digital displays remained dead.
Models: All E32 and "high E34" clusters. Keep in mind that there are three different types as described in the 299 960 fix. As I have the early up to 1989 dash the repair only applies to this dash. The other models can be repaired in a similar way, but probably have different caps in different locations:
If you have a newer cluster with the blue lid have a look at this repair page from Stig Are Holmen And if you have a newer cluster with the white lid have a look at this repair page from Winston Fong
Time to tear it all appart:
Sean already did a write up on how to remove the instrument cluster in his dash cluster blubs fix so I won't go into detail on that.
Open the instrument cluster by turning the two locking pins. Then fold it open. It may be funny to know that the rubber handbrake cover is also held in place with the same type of pins.
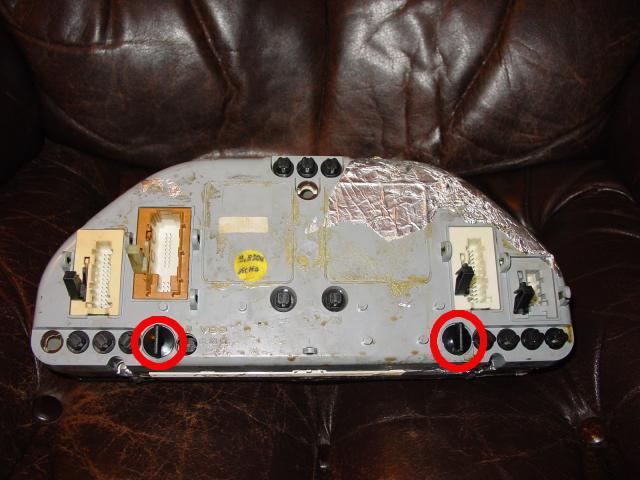
Remove the wire holding the rear lid to the rest of the cluster. The rest of the cluster is clicked in on the hinge points. Remove the lid from the rest of the cluster.
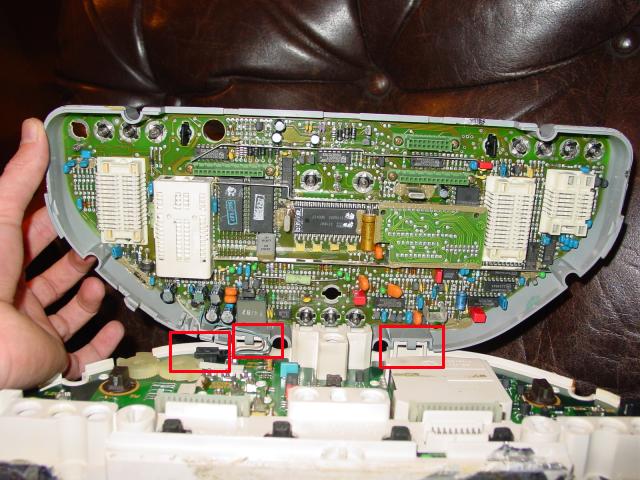
Remove the six screws holding the connectors to the plastic lid.
The connector frames on the back of the lid are clicked into the connectors on the PCB. You have to push in the clips to remove these frames. There are 4 clips per frame. The brown frame is quite tricky. You can't see the clips, but you can remove them though the holes in the white plastic connector surround.
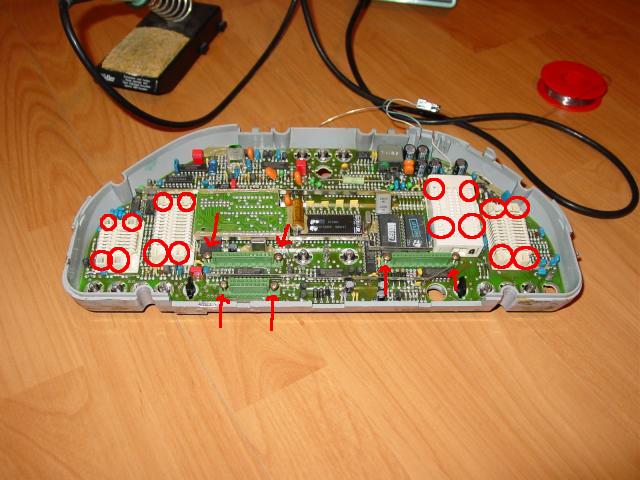
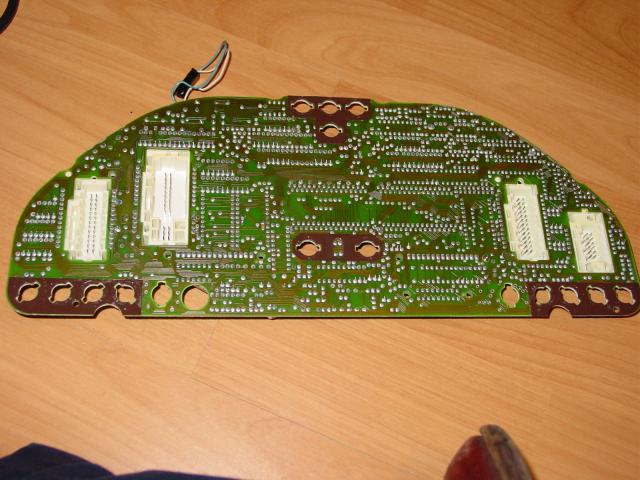
Now you should have the Printed Circuit Board out. As you can see I removed all the bulbs from the cluster, but you don't have to do this. But then again you are probably replacing all of them while you got the cluster out...aren't you?
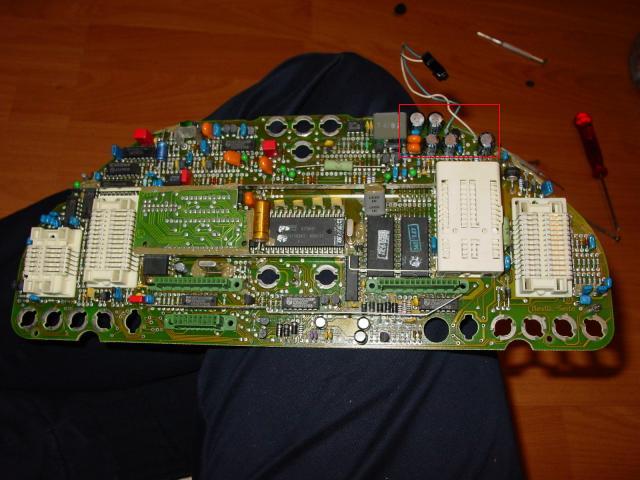
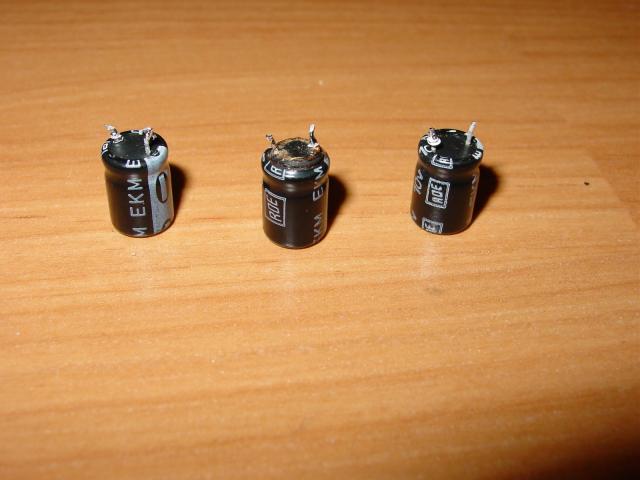
These are the five capacitators that will go bad over time (the black ones):
Now desolder the old caps. Remove the old solder with a tin-sucker. If the tin won't flow it's a good idea to add some fresh tin. The fresh tin contains some sort of resin which makes the tin flow better.
When soldering in the new caps watch the polarity. Capacitators usually have a white line marking the -side. Make sure it points in the same direction as the original capacitators did.
I didn't get the proper values for the two at the top, so I didn't replace these. I didn't think it was necessary either as I already found a nicely popped open cap.
Required parts and cost:
3 220 uF 40v caps
2 20 uF 40v caps
Total cost: under one euro/US$ !
Total amount of time needed: 1 hour
Skills needed/difficulty level: When you have soldered on microelectronics and you realise you don't want to use a 100w soldering pistol you are probably capable. If you have any doubs just take the dashboard apart and take the PCB to an electronics repairshop. You can probably get someone to replace the caps for a few beers.
Story by Johan